
GitLab CI/CD Pipeline for Ansible
This article describes one approach to setting up a GitLab CI/CD pipeline for testing and deploying Ansible content.
Lab Environment
For a lab environment, we need a GitLab server and a GitLab Runner server. Both can be provisioned using Vagrant and Ansible.
An example Vagrantfile along with with provisioning playbooks and roles are available on GitHub.
Requirements
This is confirmed to be working on macOS 10.13.6 with the following:
- Vagrant (tested on 2.1.5)
- VirtualBox (tested on 5.2.18)
- Ansible (tested on 2.6.4)
The Vagrantfile can probably be modified for different providers, but that is untested.
Provisioning Steps
- Clone repo and change to working directory:
$ git clone https://github.com/rycummins/demo-gitlab-cicd-ansible-lint.git
$ cd demo-gitlab-cicd-ansible-lint
- Install roles from Ansible Galaxy:
$ ansible-galaxy install -r roles/requirements.yml -p roles
- Launch environment (this can take 5-10 minutes on the first launch attempt):
$ vagrant up
Create Project in GitLab
After the lab environment is provisioned, the GitLab web UI should be available at https://172.16.2.50/.
Before logging in, you are prompted to set a password. This will become the password for the root account.
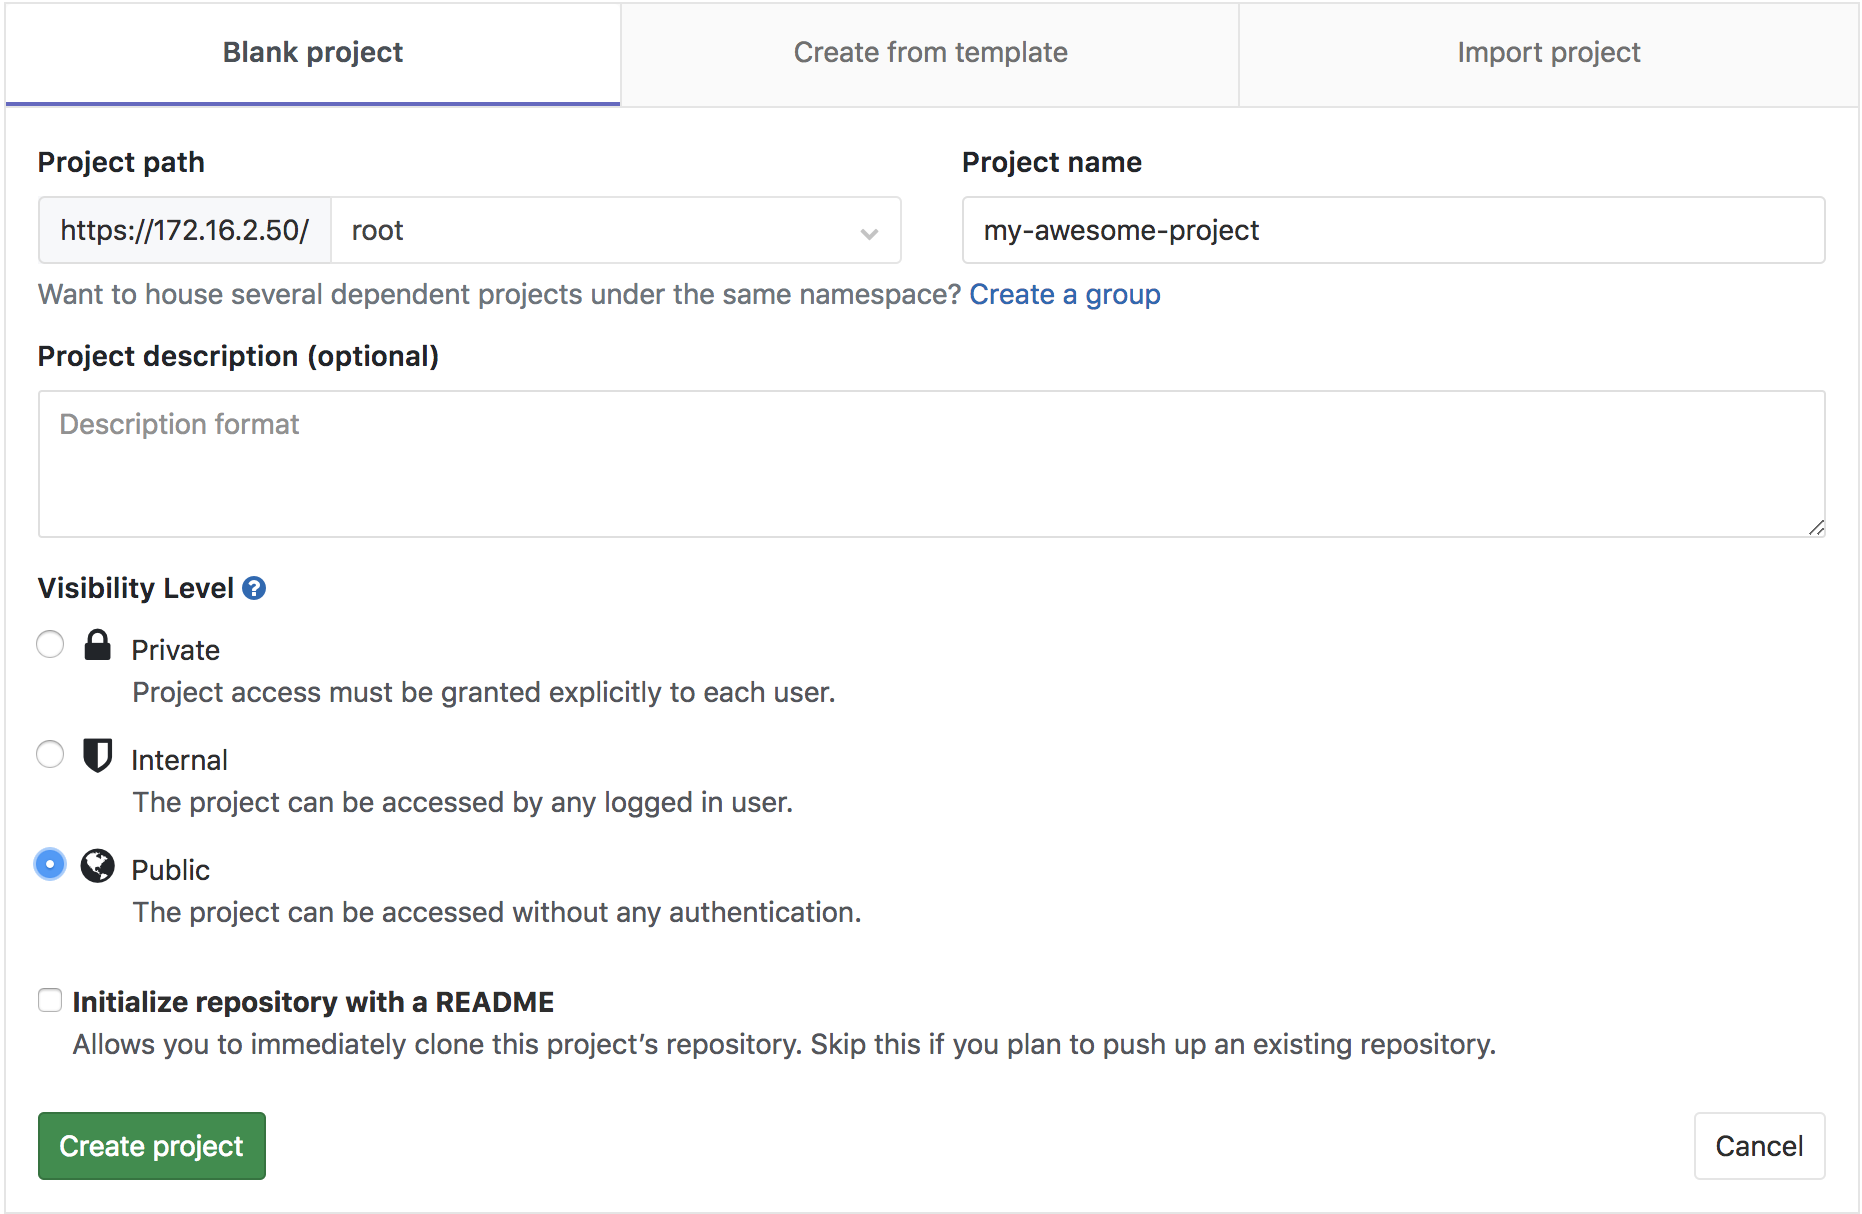
After the password is set, login as root, then follow these steps to create a project:
- Click “Create a project”.
- Enter “my-awesome-project” in the “Project name” field.
- Select the “Public” option under “Visibilty Level”.
- Click the green “Create project” button.
Add .gitlab-ci.yml to Project
Now we have an empty GitLab project named my-awesome-project.
Enabling a GitLab CI/CD pipeline requires adding a configuration filed named .gitlab-ci.yml to the project. Details about how to configure the file are available on the GitLab documentation site.
For the the sake of simplicity, the following example will enable a basic pipeline with a single job that runs ansible-lint against any files with a .yml extension in the root of the project:
stages:
  - lint

ansible_linting:
  variables:
    GIT_SSL_NO_VERIFY: "True"
  stage: lint
  script:
    - ansible-lint *.yml
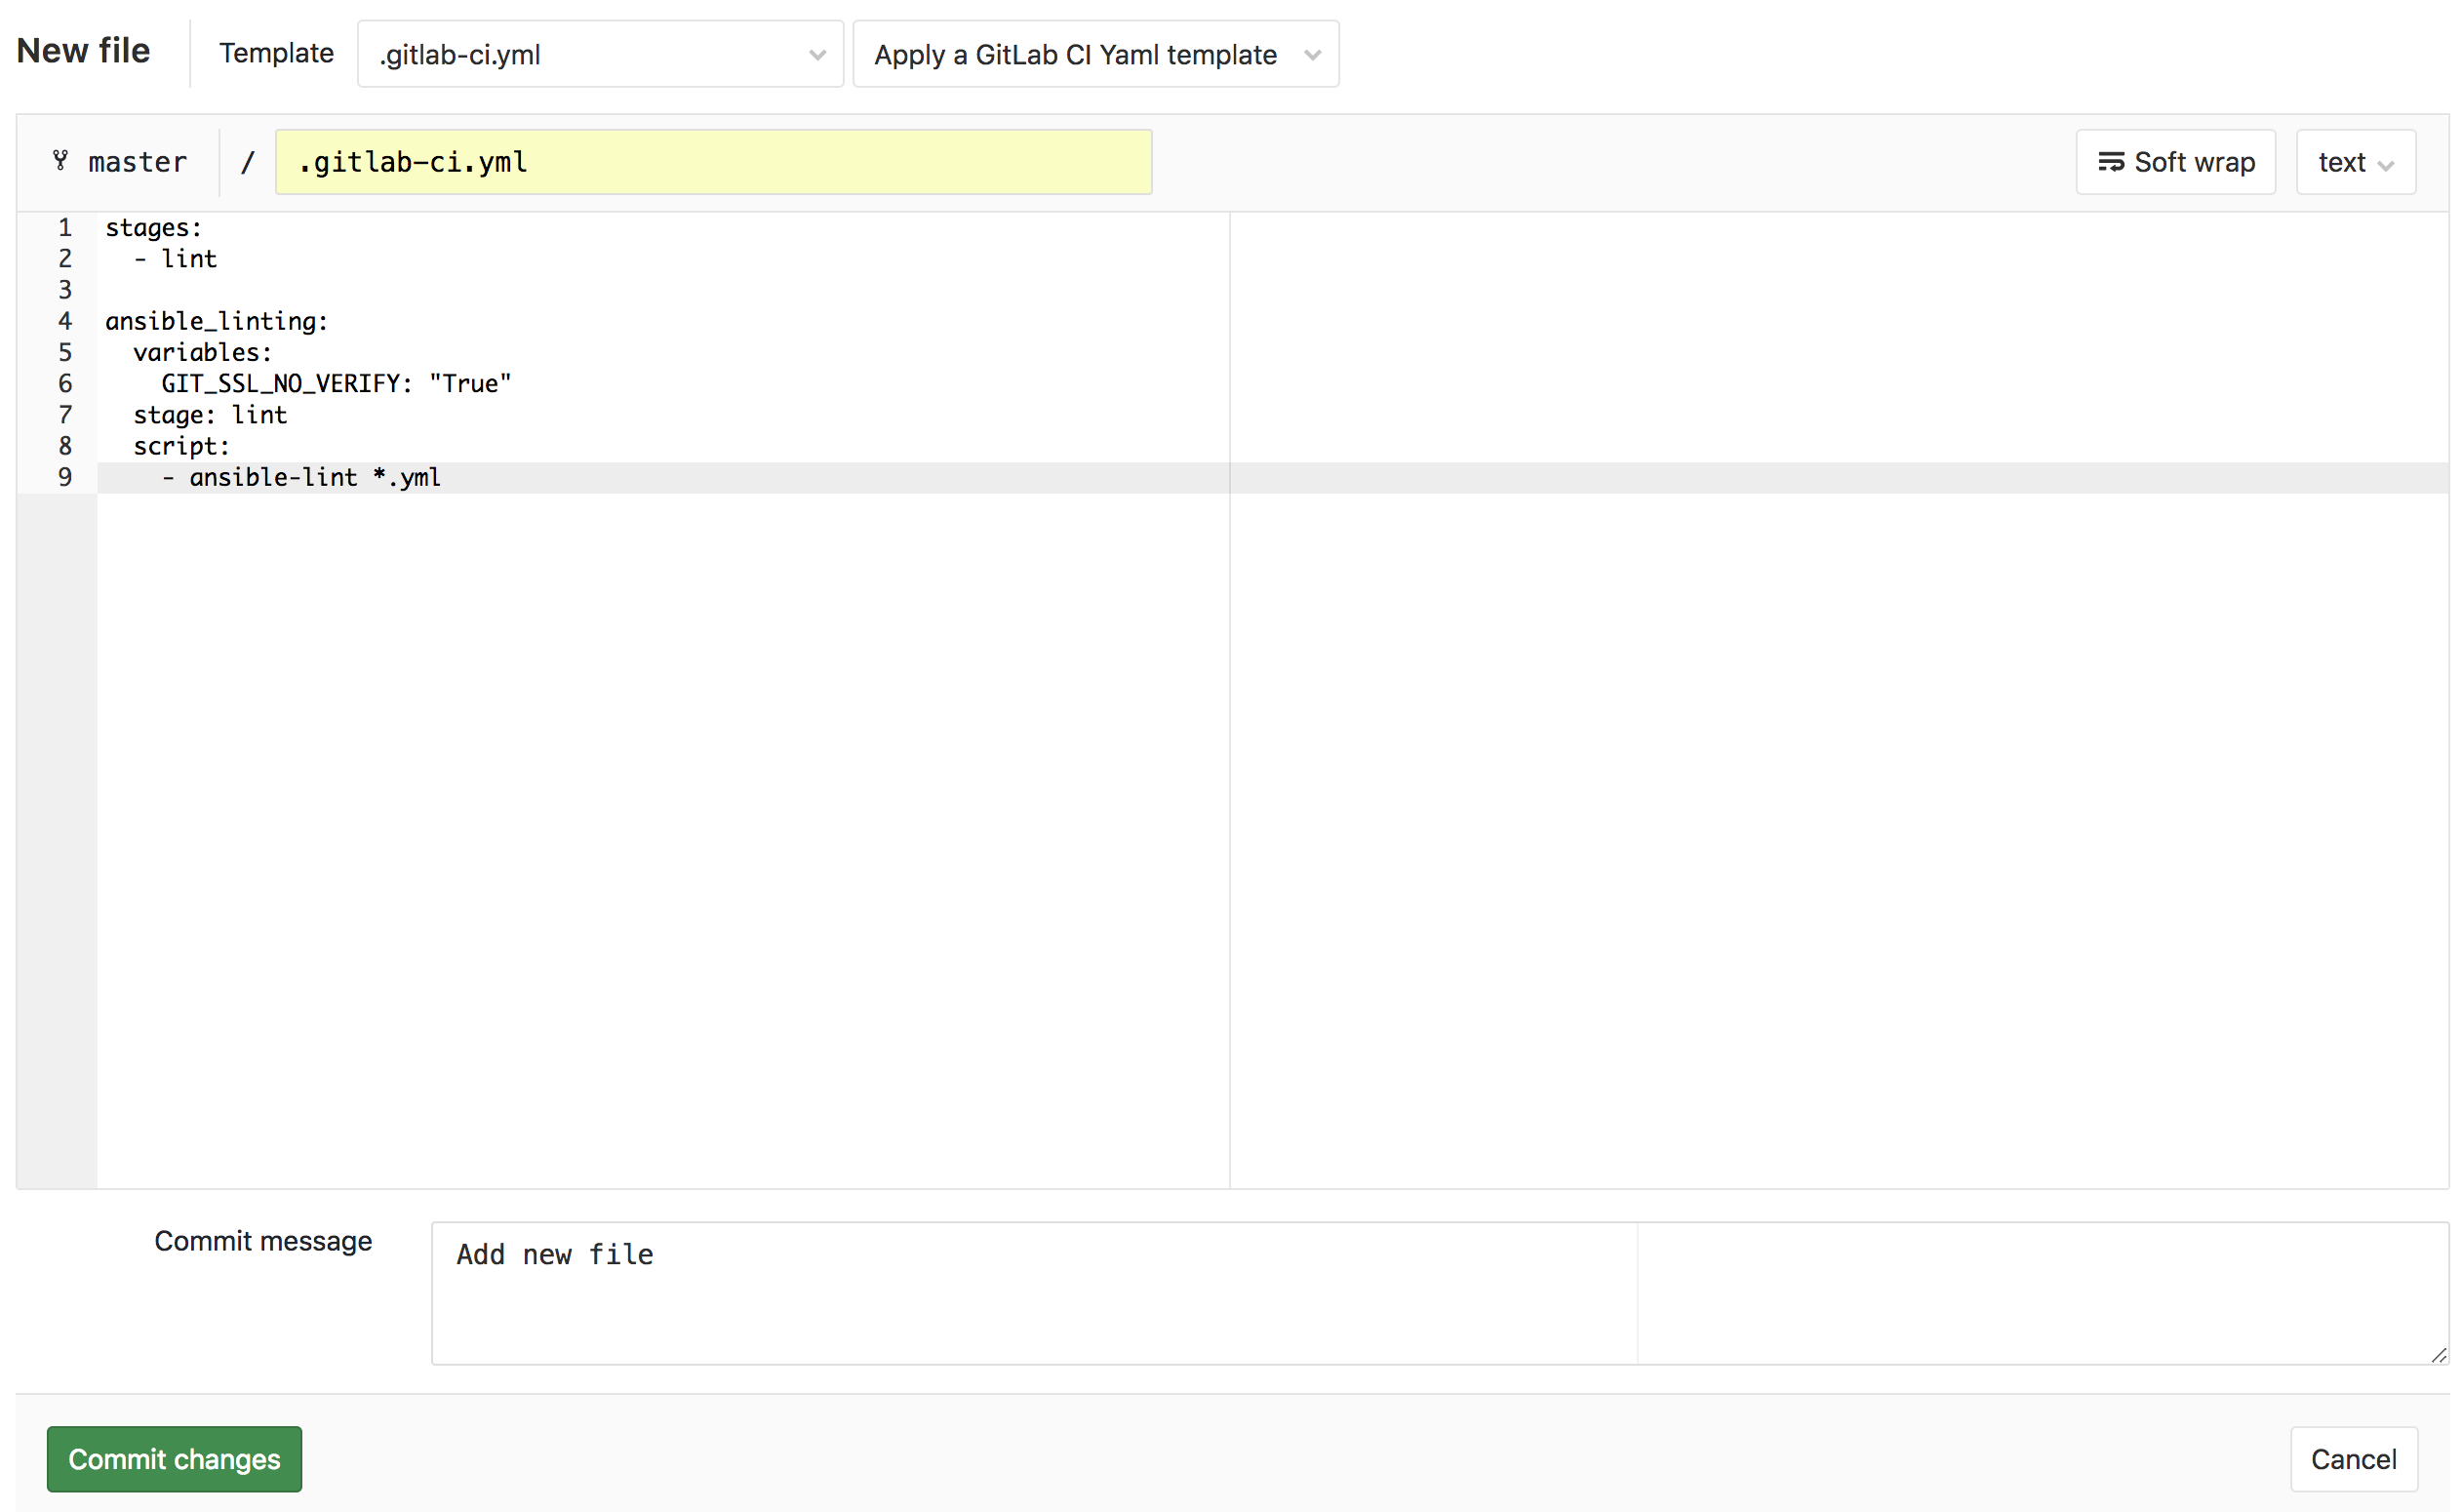
This can be added directly to the project through the GitLab web UI:
- Browse to https://172.16.2.50/root/my-awesome-project.
- Click the green “New file” button.
- Enter
.gitlab-ci.ymlin the “File name” field. - Paste the example from above in the text field.
- Click the green “Commit changes” box.
The UI will provide immediate feedback indicating the GitLab CI/CD configuration file is valid.
Register GitLab Runner
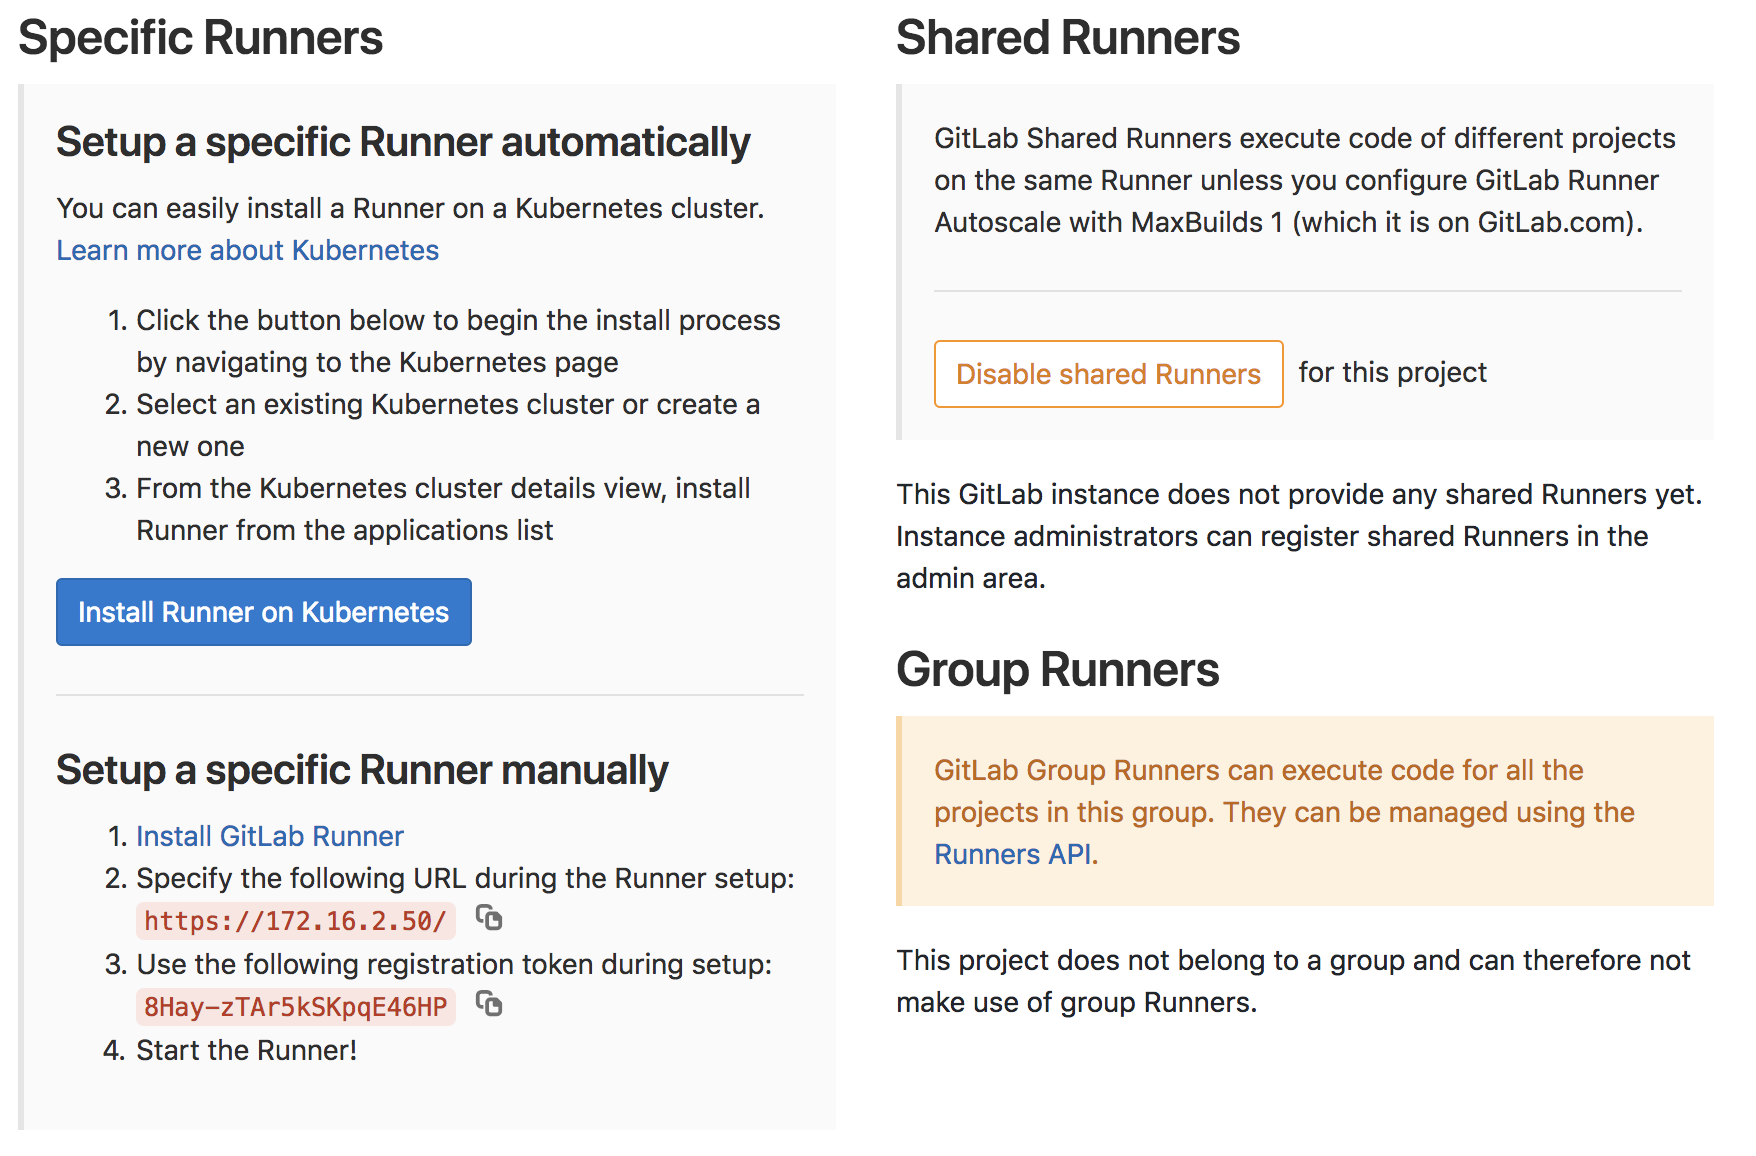
Now we must register our gitlab-runner service with the project. To do so, we first need the registration token.
- Browse to https://172.16.2.50/root/my-awesome-project/settings/ci_cd.
- Click the “Expand” button within the “Runners” section of the page.
- Scroll down to the “Setup a specific Runner manually” section of the page.
- Copy the registration token.
The same playbook that was executed by Vagrant to provision the environment can be used to register the GitLab Runner with these steps:
- Uncomment and update the last two variable entries in the
vars/main.ymlfile:
$ tail -4 vars/main.yml
# gitlab-runner register Configuration.
# (uncomment and set before "vagrant provision gitlab-runner" command to configure gitlab-runner registration)
gitlab_runner_registration_token: "8Hay-zTAr5kSKpqE46HP"
gitlab_runner_description: "this is a test runner!"
- Re-run Vagrant provisioning playbook for
gitlab-runnerVM:
$ vagrant provision gitlab-runner
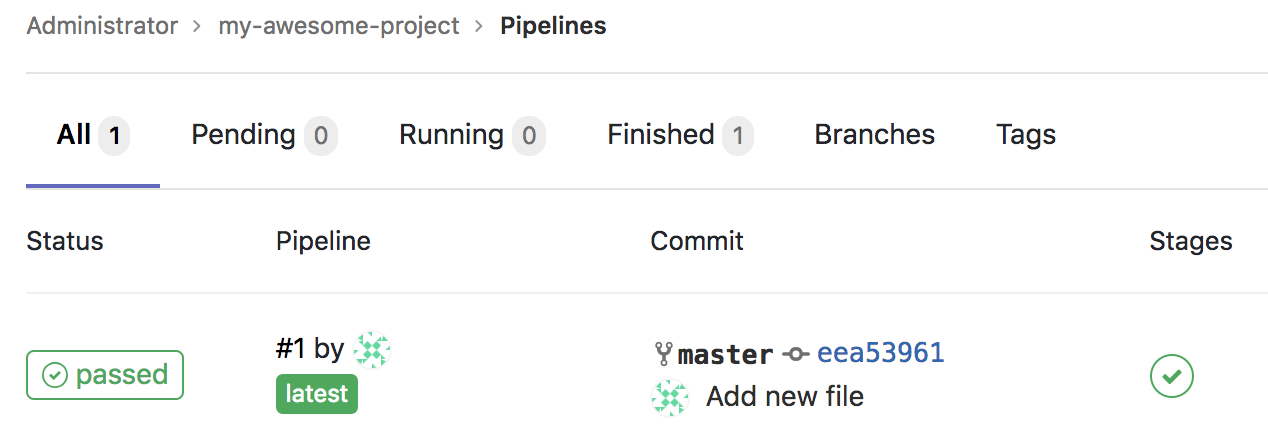
- Since the playbook is idempotent, many tasks will return “ok” and not make changes. The “Register runner to GitLab” task should show as “changed”:

- Browse to https://172.16.2.50/root/my-awesome-project/pipelines to verify the runner was successfully registered:
Commit Playbooks
Now that we have a properly configured pipeline and a registered runner to handle job execution, it’s time to commit playbooks.
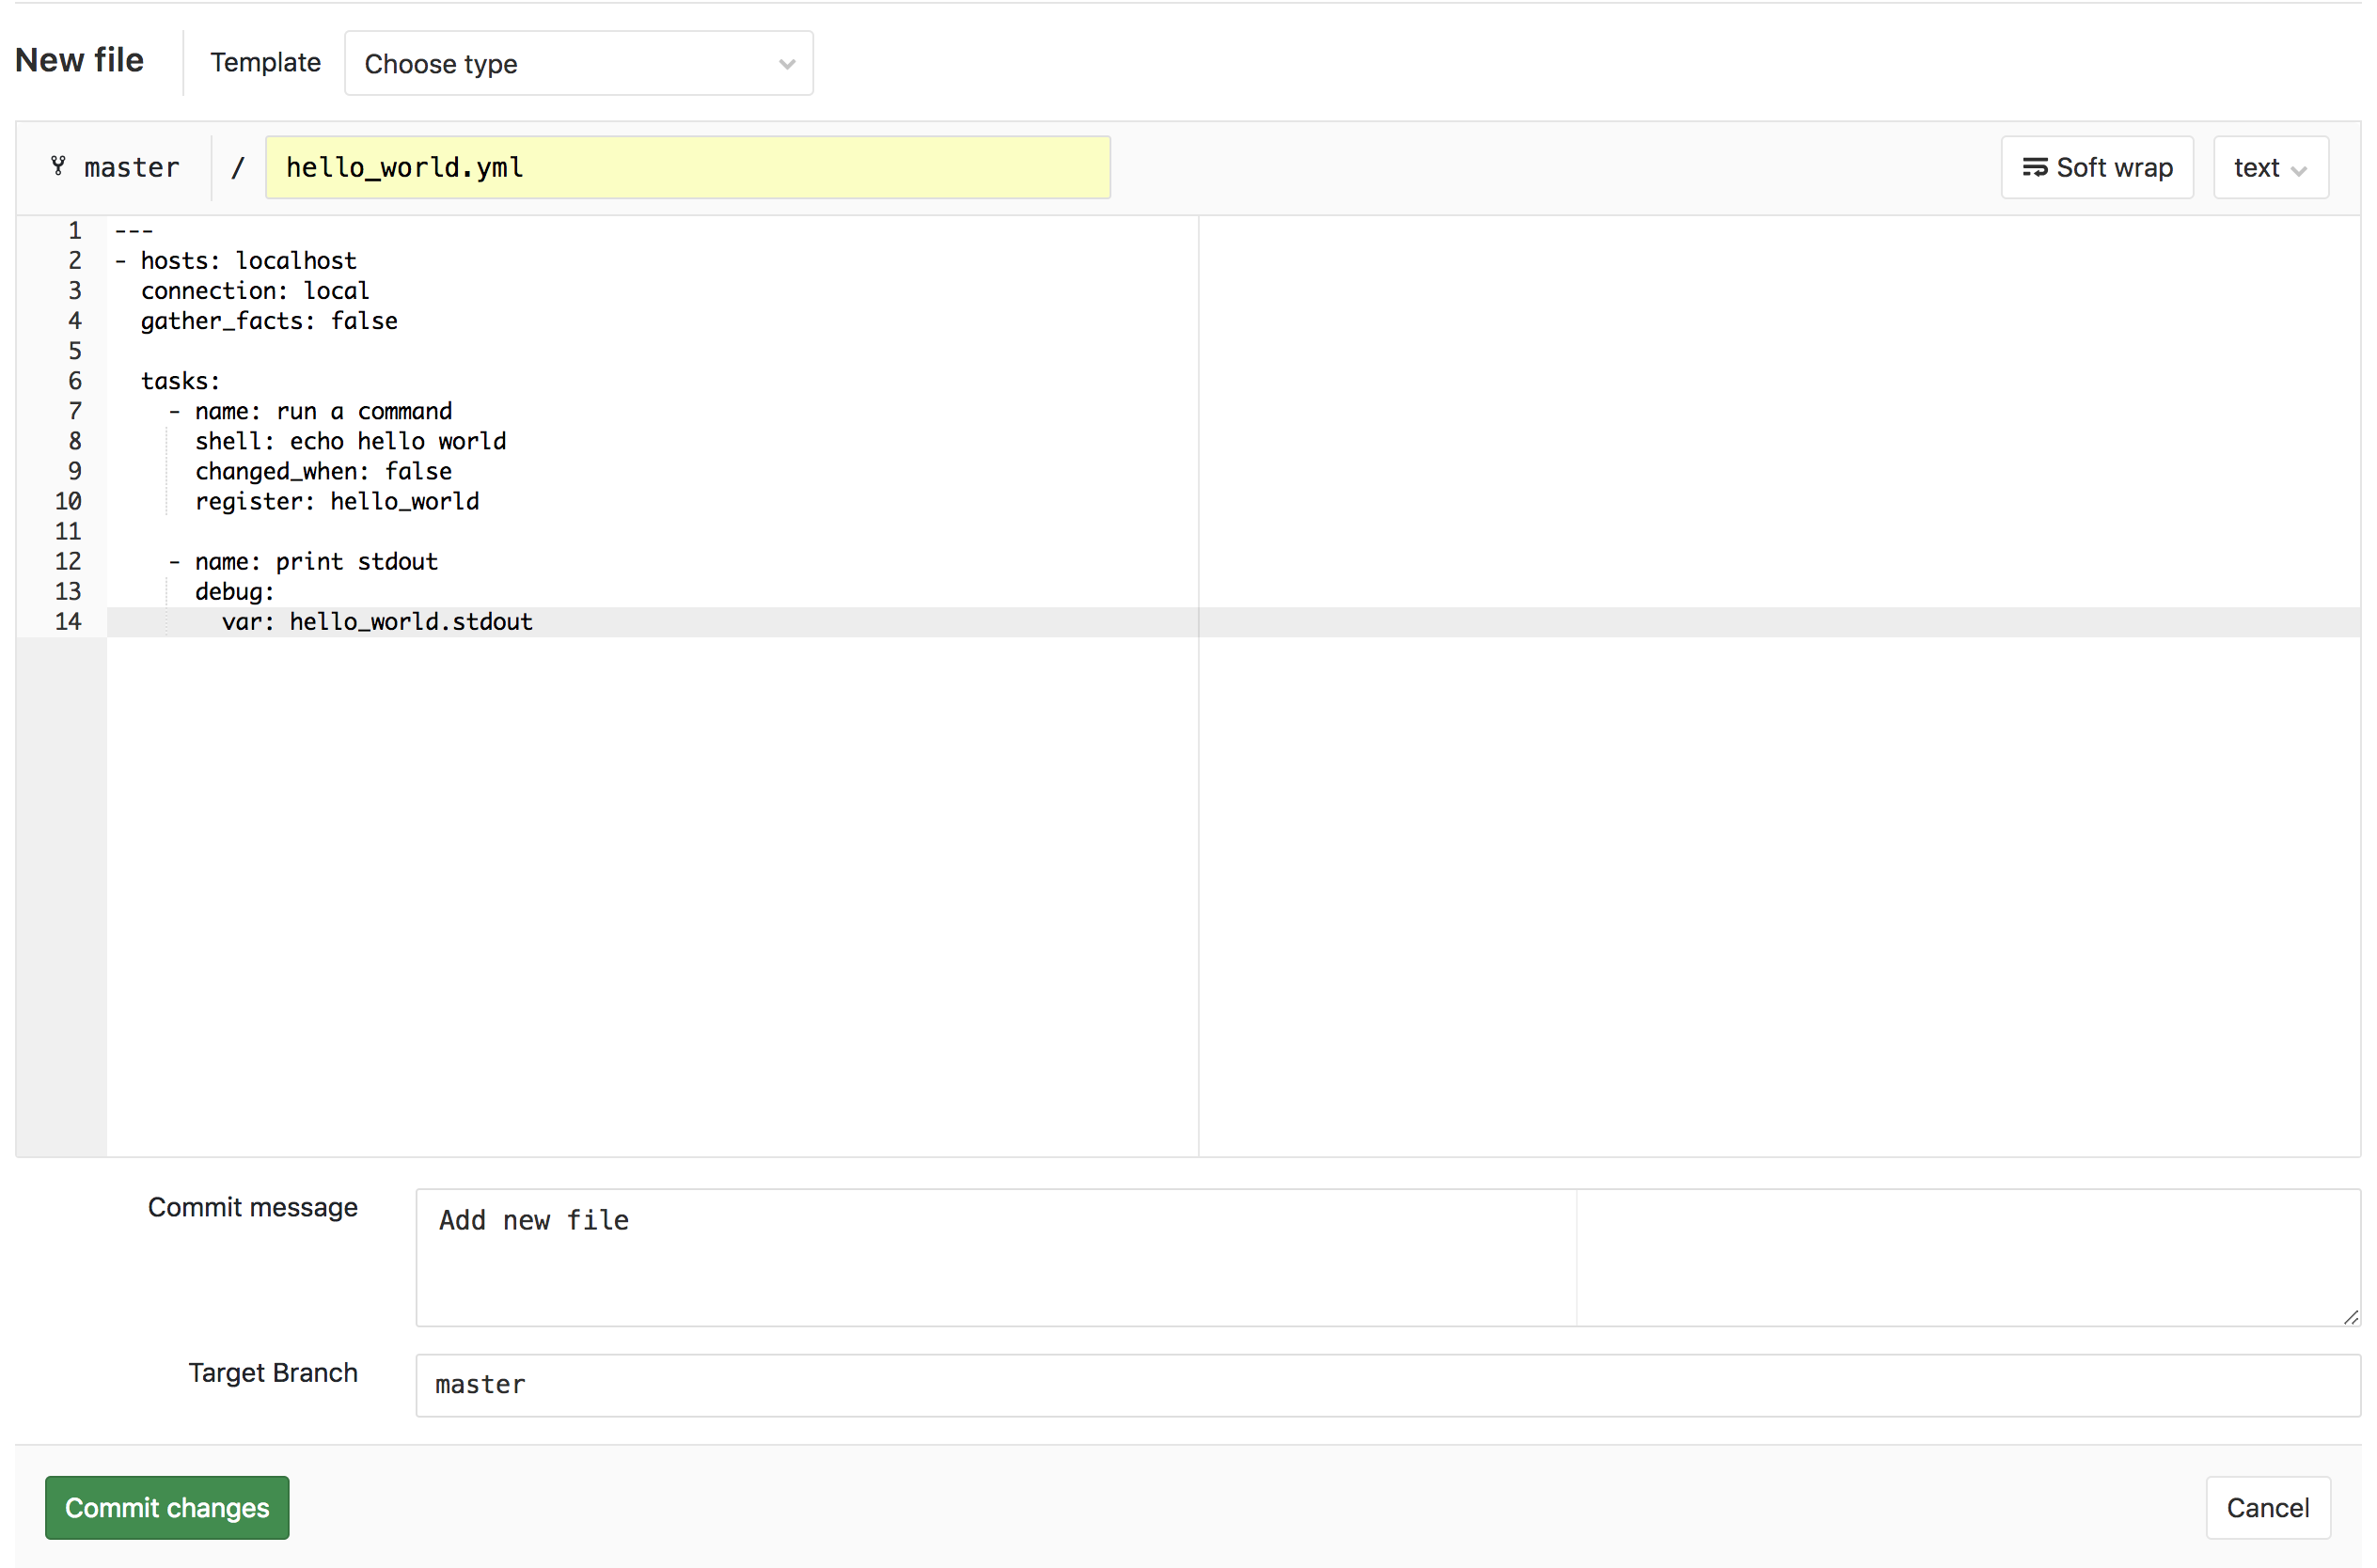
Here is an example playbook that will fail an ansible-lint check:
---
- hosts: localhost
  connection: local
  gather_facts: false

  tasks:
    - name: run a command
      shell: echo hello world
      changed_when: false
      register: hello_world

    - name: print stdout
      debug:
        var: hello_world.stdout
Use the GitLab web UI to commit the playbook to the project with these steps:
- Browse to https://172.16.2.50/root/my-awesome-project/new/master.
- Enter
hello_world.ymlin the “File name” field. - Paste the example playbook in the text field.
- Click the green “Commit changes” button.
- The commit will automatically start the CI/CD pipeline. Browse to https://172.16.2.50/root/my-awesome-project/-/jobs/2 to view the result:
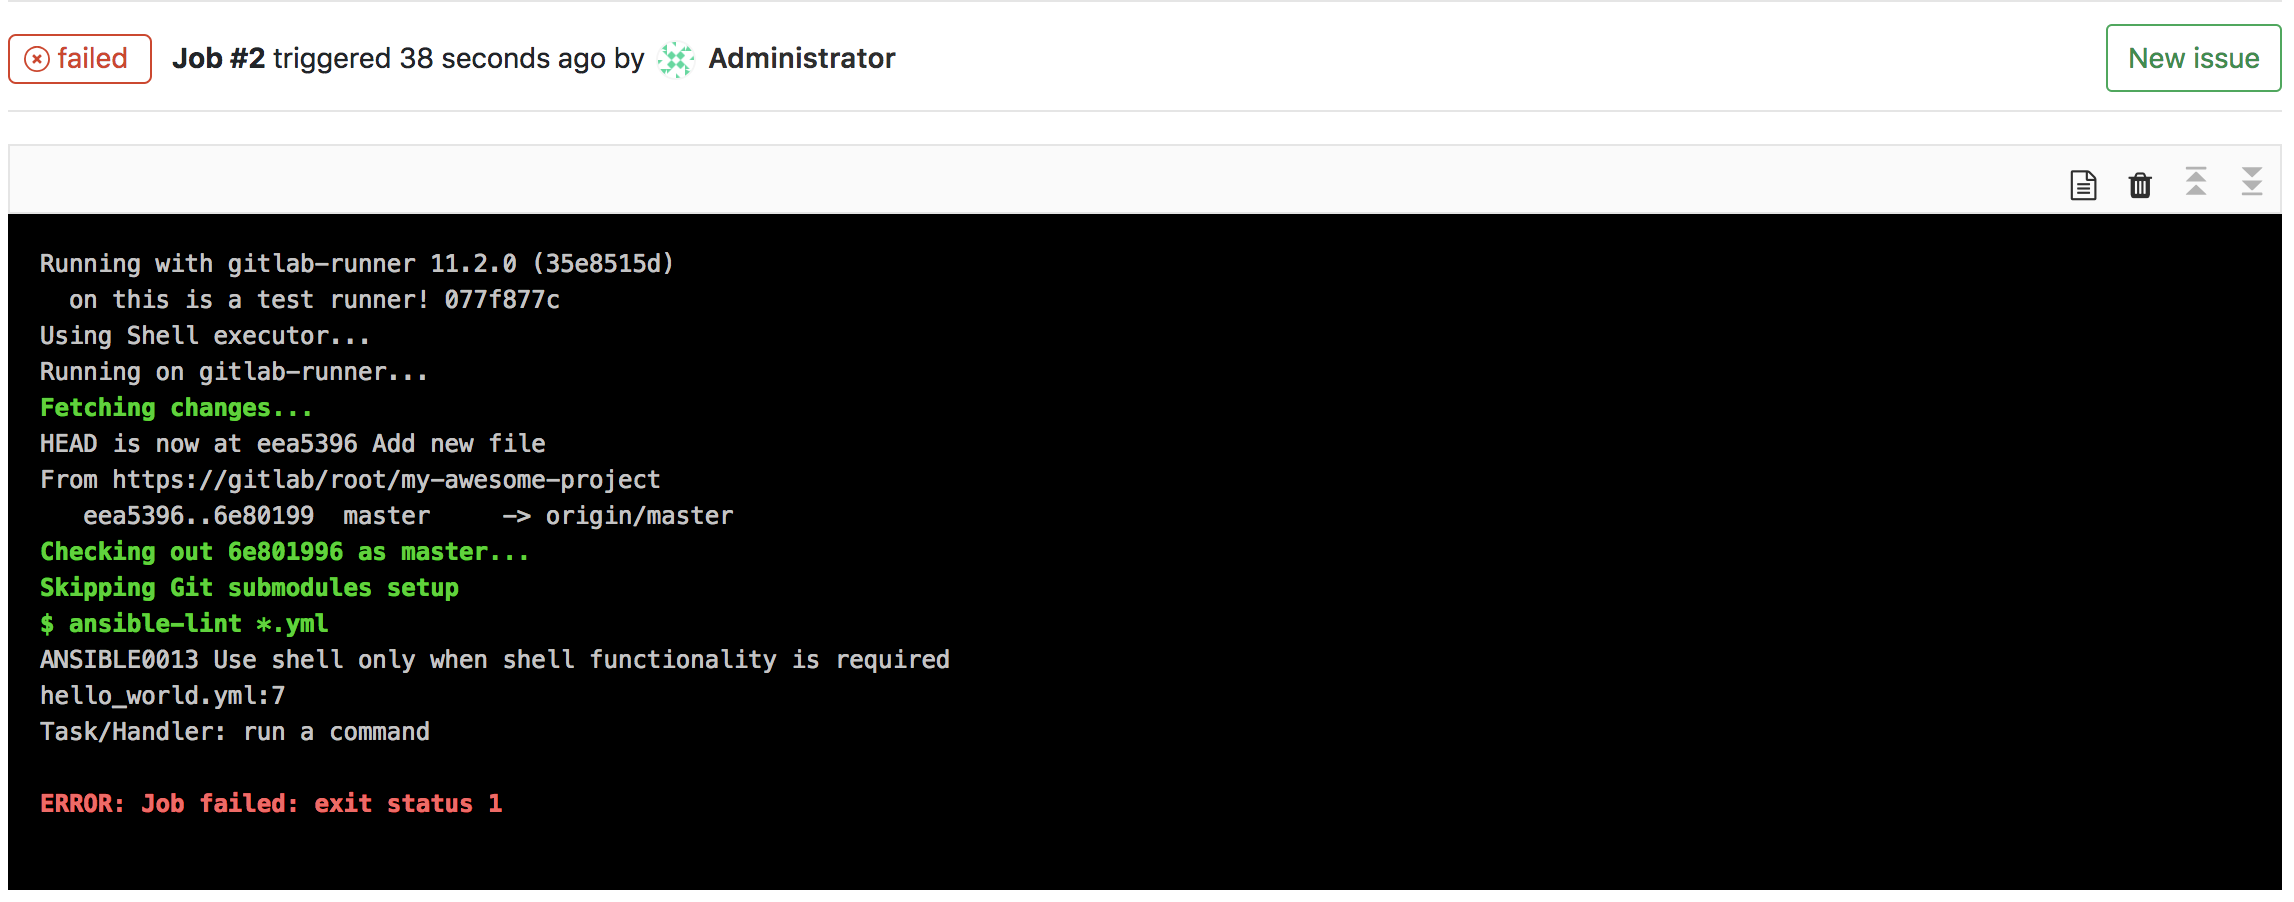
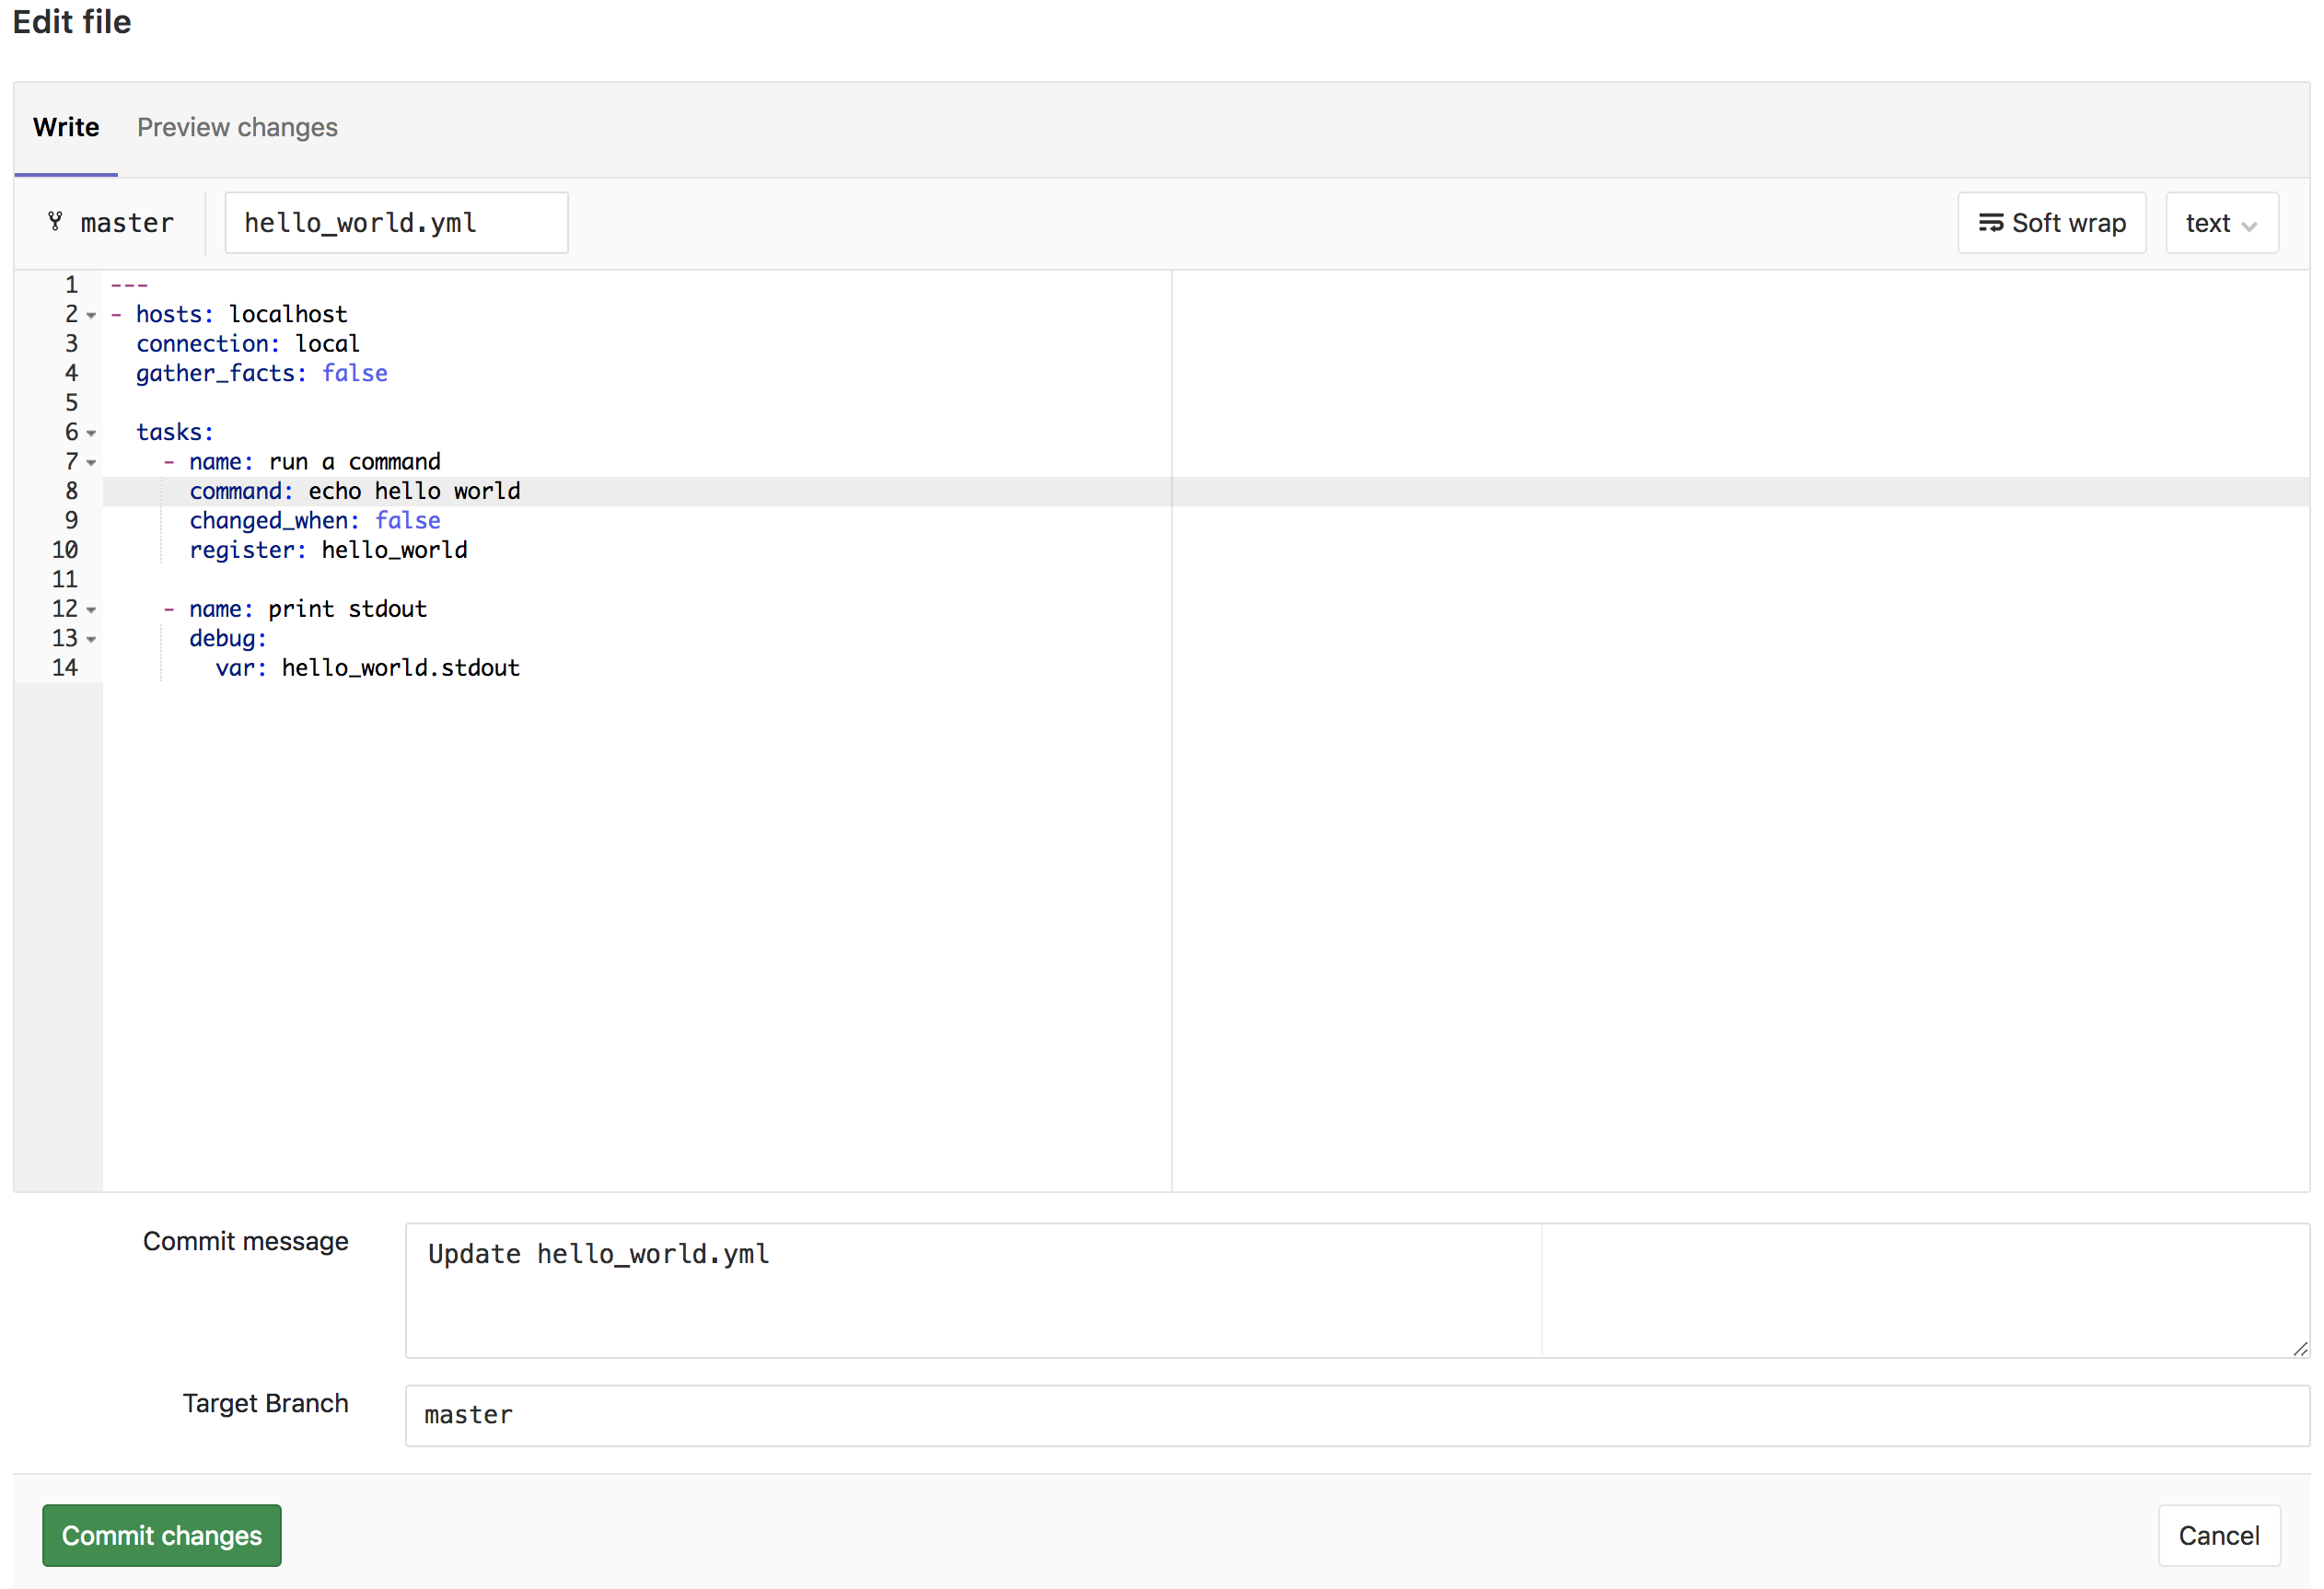
The ansible-lint job failed because the playbook has a task that uses the shell module when it’s not actually required. Use the GitLab web UI to change to task to use the command module instead:
- Browse to https://172.16.2.50/root/my-awesome-project/edit/master/hello_world.yml.
- On line 8, change
shelltocommand. - Click the green “Commit changes” button.
- The CI/CD is automatically started again. Browse to https://172.16.2.50/root/my-awesome-project/-/jobs/3 to view the result:
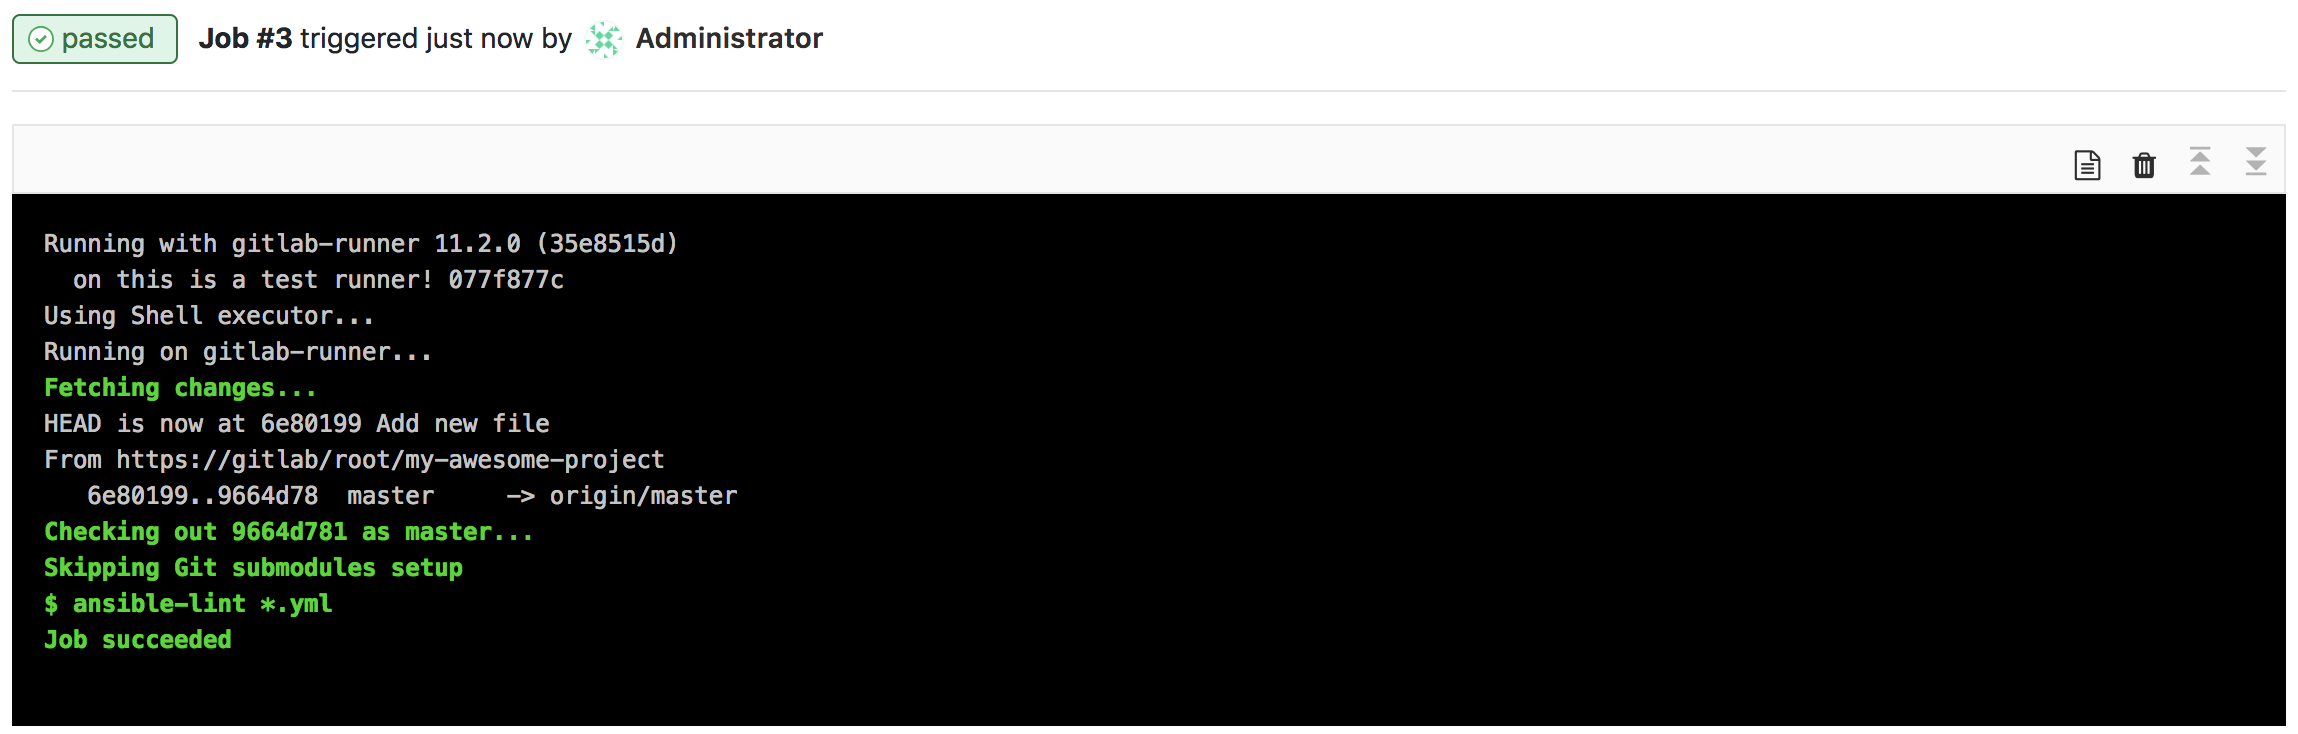
The ansible-lint job succeeded and the pipeline passed!
Next Steps
This is just a basic example of a pipeline for testing and experimental purposes. More complex pipelines might include additional jobs that perform Ansible Tower project syncing tasks, then execute a job template against a testing inventory.
Another possiblility is additional jobs that create a GitLab merge request and send notifications to potential code reviewers.
Upcoming blog posts will cover these scenarios in detail.